
|
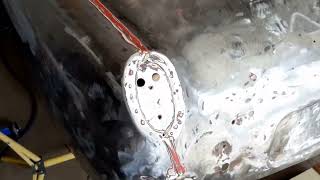
Further progress on the body tub. The fender lowers are fabbed and ready, as are the inner close-out panels. The last few days saw some final fitting and tweaks. They also saw some scraping and peeling of an oil-based seam sealer that is simply the black goo of death. I finally progressed enough to start applying some POR-15 rust protection. That stuff is sticky, stinky, and travels everywhere. But it works. I got it on all the areas that will be covered up once I close up the rear end. While it was drying between and after coats, I addressed the openings where the bumperettes mount to the rear end. The metal was all stretched, dented, and torn, so it was easier to just patch in new metal rather than try to save what was there. Of course, the grinding and cutting put some metal dust into my drying POR15, which you can see in the video. Not to worry, though. These areas are completely hidden, so this will have no impact. I also got to start spraying some of the Car Rep epoxy primer. I like the way it sprays. Apparently there is a new formulation coming out in the spring, so I'm looking forward to trying that. What I know is that I couldn't scrape this stuff off with a screwdriver once it set, so it should form a really good base for later paint. I did have some minor crazing where I sprayed it over the POR15, but I think that's because the POR itself had not fully set up yet, and was still gassing off. Where the primer went over metal directly, it was smooth as glass. So chalk that up to operator error! Without further ado... the video. 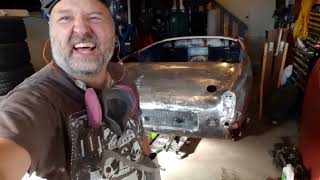 Link to video HA20 - POR15 and Rear bumperette openings
0 Comments
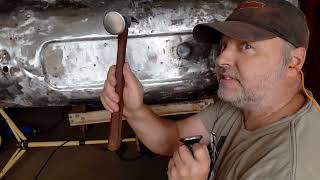
Once the tub got straightened and shaped, it was time to cut out the badly rusted area behind the wheels. Cutting this area away also gave access to the close-out panels, which were also badly rusted, and the fender supports along the wheel wells, which were all but completely gone. Some time ago, I had borrowed an english wheel from Doug, a member of the Saskatchewan British Car Club. The main purpose for borrowing it was for the lower fenders. I could buy the parts, but I wanted to make them. For starters, its a whole bunch cheaper! But it also gave me the flexibility to cut where I wanted to cut, and not be forced to make someone else's work fit. But I'm getting ahead of myself. Before I could shape and install the fender lowers, I had to deal with the supports that held them in place at the wheel wells. I also repaired the passenger side close-out panel, and used that for a template from which I fabricated a new close-out panel for the driver's side. Unfortunately, somewhere along the line (probably when my phone hit the concrete!) the video file corrupted and was unusable. At least the part where the actual fabrication happened. On the plus side, the inners are pretty boring anyway. mostly flat or single-plane bends, so nothing that anyone with a welder and a pencil couldn't duplicate. One modification I did make to the close-out panels, however, was to include a drain hole. There was no drain hole in the stock Bugeye, but this area was notorious for rusting, as evidenced by my car. My theory was, if I could let the water out, there would be less chance of rust. However, the location immediately behind the wheels leads to a lot of potential spray and debris being flung into the area. So to counter this, I made a simple shroud to cover the drain hole so material couldn't get driven into the bottom of the fender area. Sorry the video failed. I hope the photos can be helpful to anyone who wants a reference pic.  Video link to HA 17 - Body Tub 6, Rust removal and close-out fab So I was told to be as active as I could without pain during my surgery recovery. If I've got to be active, I may as well work on the car, right? I've been consistently right on the edge of overdoing it. Sometimes stepping over the edge a bit, if I must admit. But here I am. This blog entry covers enough time and work that it produced enough material for three videos, linked below. I started with the removal of the last bits of the old tub that needed to go in order to make way for the new turtle deck. The original plan was to install the deck right away, but when I saw how wonderfully open the rear became, I just had to take advantage of it for the metal working. If nothing else, the lighting was miles better! Also this past week, I removed the boot floor, which allowed me access from below to start on the metal work on the rear tub. I started out with basic dent removal. The second video is a continuation of the work on the tub. The video just got too long to do as a single episode. In the second vid, I get into the shaping of the metal. I explain how to use heat to shrink the metal to avoid the dreaded "oil can" effect, and I go over some techniques for contouring and shaping the metal using hammers, dollies, and spoons. Of course, if you're shaping a car, then both sides had better match! That's what I graduated to with the third video. I used my contour gauge to measure the shape, and then hammered and dollied the other side to match, so everything is symmetrical. One thing I cannot stress enough when doing metalwork... wear hearing protection! Ear plugs are your friend. I SAID EARPLUGS ARE YOUR FRIEND! Enjoy the videos!
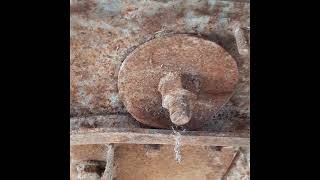
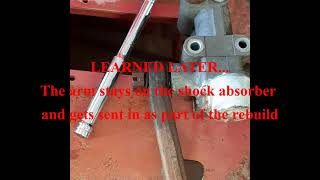
Moving onward. This past week I finished stripping the paint off the rear tub and also off of the turtle deck. I also cut the opening where the new turtle deck will be installed. This gave me great access to the inside of the boot. I did a video of this process, so not too many photos. Progress overall was slowed significantly by some health problems that resulted in a surgery following a months-long wait for an operating room to open up. (Thanks, COVID!) 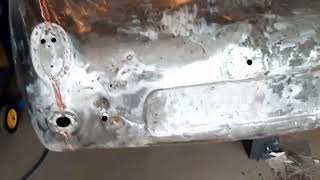 Video link to HA13 - Body Tub 2 - Stripping So apparently the bit I've been calling the rear shroud is properly titled the "turtle deck". Either way, this is the upper skin of the rear part of the body. Where a trunk or boot lid would normally be. When my brother got the car, this had been cut out to improve access to the boot area. Unfortunately, whomever did the cutting did not understand the physics of a unibody car, and cut a major support structure (there is a beam just below the skin, which was removed). I managed to find a used turtle deck from Autofarm in Ontario, Canada. You can see it in previous blog posts. When they cut it, they cut it large, and left some trim pieces on. That's awesome and wonderful, but now it's time to get rid of the pieces I don't need, and get it ready to install. This is the first of a series of videos I took while working on the rear tub. It's basically a metal and bodywork series. I took some photos, but by and large, the next several entries will be more video than photo based. It makes it much easier to explain what I'm doing. I hope you like how it turns out. 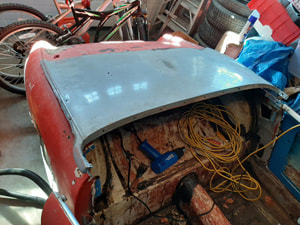 Turtle Deck Prep video link OK, I'm just sticking this in here on this date because it's before I did all the bodywork on the tub. In this entry, I want to talk about the choices I made regarding paint/primer for the Heirloom Austin, and why I made some of those choices. The reason I'm putting it in at this point is because I thought it might just make sense to put everything regarding the paint in one entry as opposed having it spread across several random posts. I also put together a video, (for which I pulled excerpts from several of the videos you will see later), and tried to explain my thinking in that format, as well. I've attached that video to this blog entry. To get right to the point, I've elected to use an epoxy paint on the Heirloom Austin. I've done this because epoxy is very durable, being highly resistant to both chemicals (such as brake fluid and gasoline) and abrasion (such as flung rocks, wayward shopping carts, and curious kids/photographers at car shows). Now comes the interesting kicker. The epoxy I've chosen... wait for it... comes in rattle cans (aka spray bombs)! I know, I know. But this was a carefully considered decision. I cover a lot of the reasons in the vid, but I'll go over them here, as well. (Video link at bottom, and here) I will start by saying that, at first, the thought of rattle cans never even entered my mind as a possibilty. I'm a trained automotive painter. The first place my brain went was to professional, body-shop brand paints. PPG, Sikkens, RM/Glasurit, or my personal favourite (both to look at and to work with) -- House of Kolor. (DuPont was never a consideration. Worked with it for a short time. Never again.) My supplier for House Of Kolor is D&E Autobody Supply in Vernon, BC. Christa is great! And they ship. But HOK is pretty pricey stuff, and the shipping would add up, as well. Plus, with HOK being solvent based, and me spraying in my garage as opposed to a proper spray booth, there are certain, shall we say, aromatic considerations. (Not to mention the possiblility of a large *boom* should something unfortunate happen between fumes and electrical tools/outlets/lighting in said garage.) I'm also a guy who likes to know his options and make decisions based on information rather than sheer instinct. So I set about gathering information on what was available within my area, or reasonable driving distance should I need something unexpected or in a hurry. There are a few options available to me from a couple of companies, and so I started gathering price info on these options. One of the other issues I am dealing with is that I do not have the same paint guns and equipment that I had when I was in the industry. Most of the guns got sold or left behind, and of course my air source was invariably a gigantic shop compressor, so I am used to having basically unlimited air supply. I'll get more into the equipment needs later, but at the moment, I'll focus on the air source issue. This is the first moment that made me sit back and kind of go, "damn". I live in a small town. There are a couple of small body shops, but nothing where I could go and rent some time in a booth. My local English Car Club (Saskatchewan British Car Club) has two chapters, the closest of which is almost a 2-hour drive. And while they offer great support, I'm not aware of any members having a spray booth. Same goes for local classic car clubs. Booths aren't easy to find. And even without the booth, shooting in a garage is doable -- especially with some creative use of fans, filters, and 8-mil construction vapour barrier -- but compressors large enough to power a spray gun (and a fresh air mask!) are not exactly portable, or cheap. These are hard to find and even harder to borrow when you have just moved to a new town. So, what to do? Well, I remember when I was still in the industry, some people were starting to use roll-on primers. Yes, you read that correctly. Roll-on automotive primer. That wouldn't solve the air source issue when it came time to paint, but it would allow me to kick that particular can down the road a bit. Okay, so let's look into the roll-on option. I'm going to go off on a bit of a tangent here, but bear with me. I'm a big believer in using a single "paint system". When I say "paint system", I mean a single line or lines of a single brand that have been developed and tested to work together. For example, House of Kolor. HOK primers are designed to work with HOK basecoats, reducers, clears, activators, and additives. They are tested to make sure that the products will work together to make a good final result. HOK primers are NOT tested to work with other brands, such as Sikkens or PPG. They may work. Or their chemistry may be completely incompatible. Using them together may cause wrinkling, lifting, loss of gloss, lack of adhesion, fish eyes... even full-on chemical reactions. I used HOK as an example, but it applies to all brands, across the board. PPG paint over a BASF primer may work or it may not. It may look like it works... for a month or so... and then problems start appearing. Painting is hard enough without introducing unnecessary variables like this. So I won't do it. So, what does that mean for me on this project? It means that whatever paint system I decide upon, that system needs to have a roll-on primer. The search was a short one. The PPG Shop Line has a primer that is not designed primarily as a roll-on, but can be used as one. Another option was Eastwood, which is basically mail-order (at least in my area). I've never worked with Eastwood before. I've heard some reviewers that love it, others not so much. I know it's definitely a budget-conscious option. And they have a roll-on primer. Okay, so that's another option. What else is out there? It was during my research that I spoke to a body shop supplier and the subject of rattle cans came up. I hadn't considered the possiblity as a real option to this point for a couple of reasons. Firstly, most rattle cans are 1K product, which means they air-dry. (Think Rustoleum or Krylon) This is a far less durable product than a 2K (2 component) paint, which cures through chemical reaction between the product and an activator or hardener. Stone chips, sun fading, scratching and generally amateurish appearance are downsides of 1K products, and I want this car to look good for many years after it's done. Secondly, while 2K products ARE available in rattle cans, they way in which they work causes a lot of potential expensive waste. Generally in a 2K rattle can, the activator is in a separate compartment within the can, and released when the user pulls a tab and then shakes the can to mix the product. This mixing starts the curing process, which is a chemical reaction, and has a time limit (also known as "pot life"). The usual pot life on a 2K product is about an hour. That means that whatever product does not get used in an hour is useless and must be thrown away. So if you only have to do a spot of, say 3-4 square feet (the size of one of my doors, for example), and the can covers a maximum of 22 square feet, that means you are throwing out between 3/4 and 7/8 of your can. This is not only wasteful, but horrifically expensive. The body shop supplier told me about another rattle can alternative. The company is called Car Rep, and they're a Finnish company that has been providing their product in Europe for several years. They sell a 2K rattle can that uses different technology, and does NOT have the pot life limitations of other 2K rattle cans. Even better, they have a complete paint system, including epoxy primer, epoxy high-build primer, epoxy colour coat, and polyeurethane clear coat, all in rattle cans. And as an added bonus, they also have optional high-atomization nozzles available, which means less rattle-can orange peel to wet-sand later. Downside? Well, rattle cans cover about 20-30 square feet per can, depending on the product. Calculating in primer, build primer, paint, and clear over a whole car... that adds up to a lot of cans. And quickly. So, me being me, I started to do the math. I roughly calculated the surface area of the car. 560 sq ft, inside and out. Plus wheels and mechanical bits in the suspension. That's for a bugeye Sprite, which is a very small car, by the way. Smaller than a Miata by quite a margin. Then I made a comparison. I calculated how many cans of each product it would take to cover the area with the desired number of coats. Then I used PPG's coverage numbers from their Technical Data Sheets to calculate how much of their product I would need to cover the same area. I should note, the PPG cost includes the price of the product, its hardener/activator, and its reducer (solvent). I allowed for two coats of build primer on the outer surfaces only, two full coats of colour (in and out), and clear coat only on the outside surfaces of the car (not the inners, under hood, floors or underside). It came out as follows: Epoxy Primer: PPG Omni MP170/175 Epoxy: $230 Car Rep Epoxy Primer: $600 (26 cans) Build Primer: PPG Omni MP281/MS250: $280 Car Rep Epoxy Hi Build: $575 (25 cans) Color Coat: PPG Omni Base/hardener $700 Car Rep Epoxy Color Coat: $830 (36 Cans) Clear Coat: PPG MC161 Clear/hardener $400 Car Rep Polyurethane Clear: $550 (22 cans) Gun Cleaner: 5 Gal gun wash $ 60 NA Total: PPG Omni bodyshop paint $1670 Car Rep Epoxy system: $2555 So yeah. Rattle cans cost about $900 more than the paint. For cans that sit on the shelf. But if you want the paint to go onto the actual car, then you need some other stuff, as mentioned above. In order to shoot bodyshop paint, you need paint guns. I used to have a gun for clear (Sata 3000 RP), two guns for basecoat -- one for water base, one for solvent base (both were Sata 3000 HVLPs). Those guns ran about $700 apiece. Not sure what the new Sata 5000 line sells for, but they aren't cheap. I also had a DeVilbiss for sealer (about $400) and a 3M plastic gun for primer (about $120). I'm not saying you need this level of gun or this many of them, I'm just saying that's what I used in the industry. Realistically, a DeVilbiss Finish Line set will run you $400 for a Chinese-made set including a basecoat gun and clear gun, plus another $100-$150 for a primer gun. So there's $500 - $550 of that $900 price difference gone already. (Plus don't forget you need to clean your guns after every use. I calculated in 5 gallons of cleaner, but that's probably about half of what you will use, not to mention the time and mess!) But your biggest cost will be the compressor. In fact, a compressor capable of shooting paint (Minimum 18 gallons per minute of airflow, recommended 22-25 gpm) will run you more money than the paint. I've seen them on sale for $1800, if it's a really good sale. Add in the dessicant and oil filter, and you are looking at over $2000. Also, if you are shooting paint, you should have an air dryer. (Moisture in paint causes fisheyes!) Tack on another $1500. So between your compressor/dryer setup plus your guns, you are already at $3500, which is $1000 MORE than the cost of all the rattle cans you will need. And you haven't bought your paint yet! How well does the Car Rep work? I'll find out and let you know, because that's what I'm going with. I based this decision on a number of factors: cost; ease of clean-up; ease of use; less equipment filling my precious garage space (if you've seen the videos, you know how tight my work space is!). Basically, it makes sense for me to try this stuff out. As you can tell by reading, I didn't make this decision on a whim. If it works, this stuff is a big win for guys like me who just do their own thing in the garage. Like I said, we'll find out.  HA11 Heirloom Austin Paint Choices video link Well then. So we had a bit of an unexpected time crunch fall upon us with regards to the Austin. I was phoning about yesterday, just trying to find information on different stuff and generally update my to-do list and timeline, when I happened to call Worldwide Auto Parts. The plan was always that Pete Caldwell would rebuild my old shocks, as he has a great reputation and has come highly recommended by pretty much everyone I've spoken to in the Austin Healey world. Since we are in the middle of a cold snap, I thought I'd make arrangements to have some of this stuff done during the winter, so it will be ready to install back onto the body when it is done. My discussion with Peter was brief (it was New Years Eve, after all!), but the general takeaway was that the new year would see new pricing. Fair enough, he hadn't raised prices in a dog's age, and deserves to make a living. However, he also told me that if I could get the shocks sent away in the next day or so, that he would honour his old pricing. PANIC! Now I've got to get the shocks off the car, boxed, and sent! One of the front shocks is already off (it was pulled while my brother and I were trying to figure out why the drivers' side front suspension was staying compressed even after the weight of the engine was removed.) Turns out the front shock itself was frozen solid. OK, so one shock is off, but that still leaves three others on the one car, plus the two shocks on the new front end. My original thought was to send all six shocks, and if the frozen one was too far gone, no harm done. My review of shipping rates later changed that, and I wound up sending the two original rear shocks along with the two working shocks from the new front end. The biggest issue with all of this is that in the normal progression of front end disassembly, the shock absorber is most definitely NOT the first part you want to remove. This led to some... interesting... solutions to problems. So there I was, outside in my unheated garage on New Years Day, swearing happily away at the Heirloom Austin suspension. I don't have many photos of this, but I do have the process on video. The vids are broken down into two parts... Front and Rear. I'll do a step by step description in the Technical (tips and tricks) section of the website shortly. Until then... VIDEO HERE: Getting Our Shocks Off, Part 1 - REAR https://youtu.be/Y7oLBS-RiZg Getting Our Shocks Off, Part 2 - FRONT https://youtu.be/l7CYNYRbwkc So a few days ago I was surfing Facebook, and I saw someone offering up a set of Bugeye floors, along with inner and outer sills for sale. The price was very reasonable, especially for Heritage parts, so I messaged the gent. It sounded good, so I followed up with a phone call, and we got talking about our projects. I definitely wanted the floors, as they would save me a ton of time and effort fabricating new ones. At the price he was selling them, it would have cost me almost as much for the raw materials, so it made sense. During our conversation, Ian (the seller) asked me about my plans for the front end. I told him I was considering a disc brake upgrade (largely due to my brother's ill-fated adventure with water and the front brakes of this car), but that it was a big cost and I was weighing it carefully. That's when he dropped the bomb. It seems he had a parts car/tub, which he had acquired for the rear half, along with the engine. He had basically cut the car in half at the firewall, and didn't need the front end. It had disc brakes. Would I be interested? HELL YES! He lives about 9 hours drive from me. For those of you in Britain, that seems like a lot. In Canada, not so much. Remember, driving from coast to coast in Canada is 4025 miles (6,500 km). To put that in perspective, London to Moscow is 1798 miles on the M1. (per Google). So for us Canadian folk, 9 hours is a nice Sunday drive. So I borrowed my friend's pickup truck and drove out to Ian's house. The front end was everything promised. It has disc brakes, but no master cylinder. Oh well. I would have wanted to replace that anyway. It also has the full front suspension, steering rack, and enough sheet metal for me to make as many patches as I like. Plus I bought the floors and sills. Oh, and while we were talking, I noticed several steel bonnets on his wall. One of the parts I need to replace is the front apron below the grille. It is very damaged from my brother's meeting with the pole mentioned way back when in the car's history. So I asked him about cutting the apron out of one of his bonnets. He said no, too much work. Just load up the entire bonnet. YAY! And then he threw in a heater/blower motor with a cracked plastic housing. I can fix that, and save another bundle! Overall, Ian was awesome. He has more parts. But I'm not publicizing them here, as I may still go back and get some more! And then when I got home, my wife helped me use my engine hoist to unload it. Only downside... I got a photo radar ticket on the way back. Yeah, it was my buddy's truck so he got the ticket. But I paid him for it. It's only fair, really. VIDEO HERE: us using his small front-end loader to put the thing on the back of the pickup truck is here... https://youtu.be/YqyVb3OsKfk  My rear shroud has arrived. I'm very happy with it's condition. The wonderful folks at Autofarm packed it beautifully. For now, it's just laid on top of the car. I will start bodywork in earnest in the spring. Right now, it's getting a bit chilly at night, and my garage is not heated. I want to be able to spray primer as soon as possible after stripping/grinding/welding, and I want it to be warm enough that the primer can properly cure overnight, without leaving time bombs for future paint problems. But yes... one of my major searches is over! As the title says, I continue to take parts off the car, labelling and bagging each one. After everything is off, I will go through it bit by bit, inventorying and assessing each part as I build my "shopping list" and my "keep it list" Disassembly is reasonably straight forward, so no need for explanations here. But I will post a couple of videos. And a lot of photos. These are mostly for my own reference so I can see where things go when I try to reassemble everything. I must say, though, that I was shocked at how easily the old girl came apart. Of course I had some issues here and there, but overall there were very few rusted/stripped/broken fasteners. Most of them came out with a shot of penetrating oil and patience with the ratchet. The vast majority were able to be removed with my air ratchet, without damage. As noted previously, everything that came off the car was "bagged and tagged" for future assessment as to whether it will be cleaned up, replaced, or upgraded. On another note, I got keys cut from Triple C Motor Accessories. I used the number on my ignition barrel, and ordered the keys by that number. They fit perfectly and turn smoothly in my ignition switch. I also ordered leather, vinyl, and carpet samples from AH Spares, Moss, and AHead4Healeys. Those have started to arrive. Before I put up all the pics, I thought I'd give a link to the compilation video I put together. It shows a walkaround body assessment, and then several short vids for referencing where some of the bits go. I figure I might need this during reassembly. Video HERE: https://youtu.be/Zst0TJ-6hs8 on YouTube 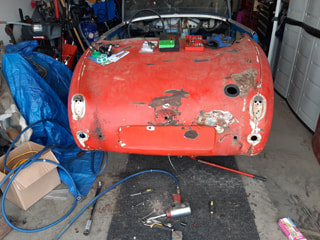 |
AuthorMy name is Ash. Archives
September 2021
Categories
All
|

 RSS Feed
