
|
Further progress on the body tub. The fender lowers are fabbed and ready, as are the inner close-out panels. The last few days saw some final fitting and tweaks. They also saw some scraping and peeling of an oil-based seam sealer that is simply the black goo of death. I finally progressed enough to start applying some POR-15 rust protection. That stuff is sticky, stinky, and travels everywhere. But it works. I got it on all the areas that will be covered up once I close up the rear end. While it was drying between and after coats, I addressed the openings where the bumperettes mount to the rear end. The metal was all stretched, dented, and torn, so it was easier to just patch in new metal rather than try to save what was there. Of course, the grinding and cutting put some metal dust into my drying POR15, which you can see in the video. Not to worry, though. These areas are completely hidden, so this will have no impact. I also got to start spraying some of the Car Rep epoxy primer. I like the way it sprays. Apparently there is a new formulation coming out in the spring, so I'm looking forward to trying that. What I know is that I couldn't scrape this stuff off with a screwdriver once it set, so it should form a really good base for later paint. I did have some minor crazing where I sprayed it over the POR15, but I think that's because the POR itself had not fully set up yet, and was still gassing off. Where the primer went over metal directly, it was smooth as glass. So chalk that up to operator error! Without further ado... the video.  Link to video HA20 - POR15 and Rear bumperette openings
0 Comments
And the work on the rear tub continues. There was a lot of really bad rust behind the wheel wells on the lower fender areas on both sides, though much worse on the driver's side. There were large holes where the metal had rusted completely away, and also thin areas where the metal was almost gone. So the job was to cut out the bad, rusted areas and replace them with welded in metal patches. Because the area has a lot of compound curves, the metal patches had to be properly shaped and fabricated. I used hammers, dollies, my own special proprietary bender (a workmate table opened slightly), and an english wheel to shape the metal, then welded it into place. The video of this process was quite long, so I split it into two episodes. Here they are below. 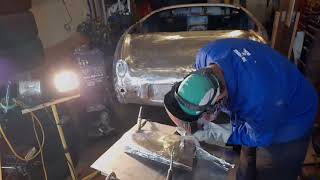 HA18 Body Tub #7, Rear Fender Fabrication, Part 1 video link 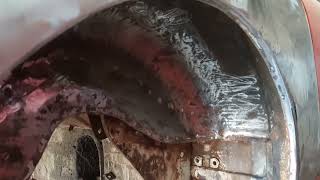 HA19 Body Tub #8, Rear Fender Fabrication, Part 2 video link Once the tub got straightened and shaped, it was time to cut out the badly rusted area behind the wheels. Cutting this area away also gave access to the close-out panels, which were also badly rusted, and the fender supports along the wheel wells, which were all but completely gone. Some time ago, I had borrowed an english wheel from Doug, a member of the Saskatchewan British Car Club. The main purpose for borrowing it was for the lower fenders. I could buy the parts, but I wanted to make them. For starters, its a whole bunch cheaper! But it also gave me the flexibility to cut where I wanted to cut, and not be forced to make someone else's work fit. But I'm getting ahead of myself. Before I could shape and install the fender lowers, I had to deal with the supports that held them in place at the wheel wells. I also repaired the passenger side close-out panel, and used that for a template from which I fabricated a new close-out panel for the driver's side. Unfortunately, somewhere along the line (probably when my phone hit the concrete!) the video file corrupted and was unusable. At least the part where the actual fabrication happened. On the plus side, the inners are pretty boring anyway. mostly flat or single-plane bends, so nothing that anyone with a welder and a pencil couldn't duplicate. One modification I did make to the close-out panels, however, was to include a drain hole. There was no drain hole in the stock Bugeye, but this area was notorious for rusting, as evidenced by my car. My theory was, if I could let the water out, there would be less chance of rust. However, the location immediately behind the wheels leads to a lot of potential spray and debris being flung into the area. So to counter this, I made a simple shroud to cover the drain hole so material couldn't get driven into the bottom of the fender area. Sorry the video failed. I hope the photos can be helpful to anyone who wants a reference pic.  Video link to HA 17 - Body Tub 6, Rust removal and close-out fab |
AuthorMy name is Ash. Archives
September 2021
Categories
All
|
 RSS Feed
